The PROGMEM keyword is a variable modifier, it tells the compiler to "keep this variable in flash memory", instead of loading it into SRAM. Th PROGMEM is useful for Arduino Boards that have limited SRAM, but yet many Arduino users and even some library developers don't use it.
I recently search through about 15 books on the topic of Arduino, and found that only one book has a dedicated chapter talk about PROGMEM, and one book actually has an example code that using it, another book memtioned about it and refer the user to Arduino Reference page about PROGMEM without further discussing it. For the rest of books (including one that claimed to be Technical Reference of Arduino) never mentioned about it at all.
I get it that if you are simply doing some simple sketch like blinking an LED, or read a few sensors and print out the results on Serial Monitor, you probably will never need to know about PROGMEM. That's probably the audiences that most of those books are targeting for. However, if you doing some IoT system or more complex sensors with LCD display, sooner or later, you will start to pay the attention of the usage of the SRAM on your Arduino board, and wondering why your 100ish-line of sketch took up so much of the precious 2048 bytes of Arduino Uno SRAM.
Harvard versus Van Neumann architecture
Before we talking about what is PROGMEM and what it does, we need to understand two basic design architectures in computer microprocess design.
When a program is running on your Personal Computer (Mac, Windows or Linux machines), the programs are stored in the media such as hard disk, it first copies the entire program from the hard disk into RAM and then executes that copy of the program. The program might declare many variables and data structures that uses more of the RAM. When you finish the use of the program, some of the data are saved into the hard disk, and the entire copy of the program that is running in the RAM get "through-away" and the memory is free up for next program to use. In computer microprocessor architecture design term, this approach is called Von Neumann architecture where the code and data exists in the same addresss space at RAM.
Most of the Arduino boards are using ARV-based microcontrollers(MCU). Many AVRs have limited amount of Static RAM(SRAM), but may have more Flash space available. For example, Arduino Uno has SRAM of only 2048 bytes, and 32728 bytes of Flash memory. The AVR is a Harvard architecture processor, which is an architecute design mostly used for microcontroller (MCU) chip design where the program memoery is separated from data memory. For MCUs with Hardvard architecture, the program is directly execute from the Program memory(Flash memory), but all variables and data are loaded into SRAM. many of the variables, such as your message prompt as a string, are not necessary to be loaded into the SRAM because although it is defined as a string variable, the content of the string never changed.
The problem is exacerbated by the fact that most of the programming languages, C and C++ with no exception, was not designed for Harvard architectures, it was designed for Von Neumann architecture like your Personal Computer where code and data exist in the same address space.
Harvard architecute could mean different things
The term "Harvard architecture" can mean different things for different processors or MCUs: Take ARM chips as an example, it have Harvard "bus" architecture, which mean instruction and data accesses can happen at the same time. However, the memory space is unified, which means both instruction and data share the same memory space.
This is different from Harvard memory architecture as used in AVR-based MCU, or other 8-bit MCUs, such as 8051, Pic, etc, that have separated memory spaces for instructions and data.
Harvard architecture can also be used to specify cache designs. Level 1 cache in ARM processors are normally Harvard - separated instruction and data caches.
Storing Data in Program Space
This means that any compiler for a Harvard architecture processor, like the AVR, has to use other means to operate with separate address spaces. Arduino uses a variation of GCC compiler for compiling code into AVR codes. The PROGMEM attribute that you see in Arduino came from avr-libc which is part of the AVR toolchain. avr-libc provides a simple macro PROGMEM that is defined as a attribute to tell GCC compiler to do something special about the variables that have the attribute PROGMEM. The PROGMEM macro is defined in the
On How to use LCD5110/PCD8544 with Arduino, we create a function to print a logo image on the LCD display, the image is created with an array consists of 504 bytes, and that's nearly 25% of the total SRAM memory of an Arduino Uno:
const char image[504] = {
  0x00, 0x00, 0x00, 0x00, 0x00, 0x00, 0x00, 0x00, 0xe0, 0xf0,
  0xf0, 0xf8, 0xfc, 0xfc, 0x7c, 0x7c, 0x7c, 0x7c, 0x7c, 0x7c,
  0x7c, 0x7c, 0x7c, 0x7c, 0x7c, 0x7c, 0x7c, 0x7c, 0x7c, 0x7c,
  ...
  0x1e, 0x1f, 0x1f, 0x1f, 0x1f, 0x1f, 0x1f, 0x1f, 0x1f, 0x1f,
  0x1f, 0x1f, 0x1f, 0x1f, 0x1f, 0x1f, 0x1f, 0x1f, 0x1f, 0x1f,
  0x1f, 0x1f, 0x1f, 0x1f, 0x1f, 0x1f, 0x1f, 0x1f, 0x1f, 0x0f,
  0x0f, 0x07, 0x01, 0x00
};
Under the normal circumstance, when the sketch is run, the image is loaded into the SRAM so that we can access the image array directly.
void printImage(const char *image) {
  cursor(1,1);
  for (int i = 0; i < (LCD_WIDTH * LCD_HEIGHT / 8); i++) {
    write(DATA, image[i]);
  }
}
In order to keep the logo image in program memory, we could add the PROGMEM macro as the logo image array's attribute to signal the compiler that the variable should be treated differently and should be kept in the program memory instead of loading it into SRAM.
const char image[504] PROGMEM = {
  0x00, 0x00, 0x00, 0x00, 0x00, 0x00, 0x00, 0x00, 0xe0, 0xf0,
  0xf0, 0xf8, 0xfc, 0xfc, 0x7c, 0x7c, 0x7c, 0x7c, 0x7c, 0x7c,
  0x7c, 0x7c, 0x7c, 0x7c, 0x7c, 0x7c, 0x7c, 0x7c, 0x7c, 0x7c,
  ...
  0x1e, 0x1f, 0x1f, 0x1f, 0x1f, 0x1f, 0x1f, 0x1f, 0x1f, 0x1f,
  0x1f, 0x1f, 0x1f, 0x1f, 0x1f, 0x1f, 0x1f, 0x1f, 0x1f, 0x1f,
  0x1f, 0x1f, 0x1f, 0x1f, 0x1f, 0x1f, 0x1f, 0x1f, 0x1f, 0x0f,
  0x0f, 0x07, 0x01, 0x00
};
Please note that variables with PROGMEM must be either globally defined, OR defined as a
staticvariable within a function.
Now the image data resides in the program space, the code to access the image will no longer work. The keep the image in program memory based on the PROGMEM attribute we just added. However, the write() function in our program is retrieving the data from SRAM, Not the program memory where the data is actually located. The problem is that GCC does not intrinsically know that the data resides in the program space.
In order for the program to be able to retrieve the correct data from program memory, avr-libs created several macros that take an address that points to the program memory, and 'translate' it into the address pointing to the program memory. Among all the macros for accessing data, pgm_read_byte can be used for retrieving a byte from the image data by taking a PROGMEM pointer as its argument, and returns the byte located at that pointer value from the program memory.
void printImage(const char *image) {
  cursor(1,1);
  for (int i = 0; i < (LCD_WIDTH * LCD_HEIGHT / 8); i++) {
    _write(DATA, pgm_read_byte(image + i));
  }
}
Now that you can successfully store and retrieve simple data from program memory, you can compile the Arduino sketch to check the memory usage before and after adding the PROGMEM and pgm_read_byte.
There are a couple of things for someone who is new to PROGMEM when converting a normal array into a PROGMEM array.
We usually like to declare a pointer to a string like this:
const char *ssid = "my WiFi SSID";
If you simply trying to add PROGMEM modifier to it, you will get compilation error saying:
variable 'myStr' must be const in order to be put into read-only section by means of '__attribute__((program))'
You must change variable declaration into a string array instead of a pointer.
const char ssid[] PROGMEM = "my WiFi SSID";
Another thing that tricked someone who is new to PROGMEM is the convertion for the access of an array to pgm_read_byte. Let's say we have this table with an two-dimemtional array that you have add the PROGMEM atrribute to it:
const char myData[11][10] PROGMEM =
{
  {0x00,0x01,0x02,0x03,0x04,0x05,0x06,0x07,0x08,0x09},
  {0x0A,0x0B,0x0C,0x0D,0x0E,0x0F,0x10,0x11,0x12,0x13},
  {0x14,0x15,0x16,0x17,0x18,0x19,0x1A,0x1B,0x1C,0x1D},
  {0x1E,0x1F,0x20,0x21,0x22,0x23,0x24,0x25,0x26,0x27},
  {0x28,0x29,0x2A,0x2B,0x2C,0x2D,0x2E,0x2F,0x30,0x31},
  {0x32,0x33,0x34,0x35,0x36,0x37,0x38,0x39,0x3A,0x3B},
  {0x3C,0x3D,0x3E,0x3F,0x40,0x41,0x42,0x43,0x44,0x45},
  {0x46,0x47,0x48,0x49,0x4A,0x4B,0x4C,0x4D,0x4E,0x4F},
  {0x50,0x51,0x52,0x53,0x54,0x55,0x56,0x57,0x58,0x59},
  {0x5A,0x5B,0x5C,0x5D,0x5E,0x5F,0x60,0x61,0x62,0x63},
  {0x64,0x65,0x66,0x67,0x68,0x69,0x6A,0x6B,0x6C,0x6D}
};
Under the normal circumstance, we access the array simply with:
char data = myData[i][j];
If you simply wrap it with pgm_read_byte with the array, it will not work. Remember that the pgm_read_byte take an address of your data as the argument and return a byte. So the correct way is:
char data = pgm_read_byte(&myData[i][j]);
or alternatively use the pointer arithmatic notation as:
char data = pgm_read_byte(myData[i]+j);
Storing array of strings in Program Space
Sometime you have an array of strings (a string itself is an array in C), and it is often take up relatively large amounts of memory, so you'd want to put them in Program Space.
const char *instructions[] =
{
    "Connecting to WiFi...",
    "WiFi connected",
    "Establishing TCP Connection...",
    "TCP established",
    "Connection terminated"
};
However, it is not sufficient to just declare the istructions array with PROGMEM, because AVR GCC only treats the declaration that it attached to as as PROGMEM variable. So in this case, we successfully put the instructions variable, the array itself, in the program memory by adding PROGMEM modifier. This DOES NOT put the actual strings themselves into program memory. You will have to declare each string with PROGMEM.
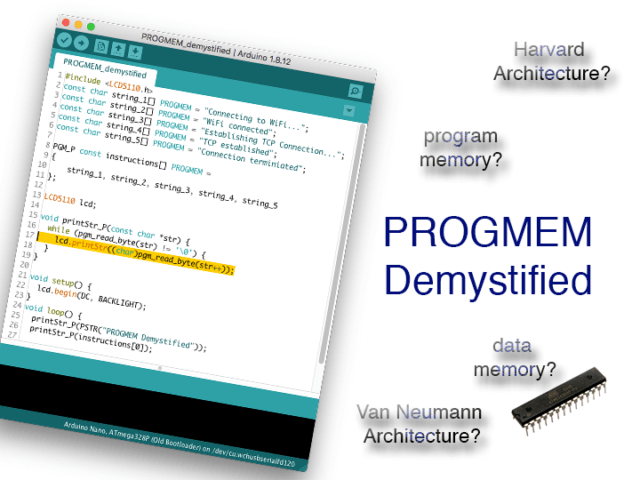
const char string_1[] PROGMEM = "Connecting to WiFi...";
const char string_2[] PROGMEM = "WiFi connected";
const char string_3[] PROGMEM = "Establishing TCP Connection...";
const char string_4[] PROGMEM = "TCP established";
const char string_5[] PROGMEM = "Connection terminiated";
Then create the array like this:
PGM_P const instructions[] PROGMEM =
{
    string_1,
    string_2,
    string_3,
    string_4,
    string_5
};
The PGM_P is another macro defined in instructions must be declared as a const to be put into program memory in this case.
To retrieve the strings take a little of effort than usual string array retrieval. Instead of retrieve byte by byte using pgm_read_byte, we can copy the string that we need out to a temperary buffer in SRAM.
// Get first string in the instructions array
char buffer[strlen_P(instructions[0])];
strcpy_P(buffer, (PGM_P)pgm_read_word(&instructions[0]));
Serial.println(buffer);
The pgm_read_word macro will return a 16-bit unsigned integer and typecasts as a true pointer to program memory, PGM_P. This pointer is an address in program memory pointing to the string that we want to copy.
Both strcpy_P() and strlen_P() are the program memory version of standard c string library strcpy() and strlen() functions for string manipulation in program memory. There are more special string functions with suffix of _P in the
If you read Arduino Reference on PROGMEM, intead of using PGM_P macro from avr/pgmspace.h, it uses a slightly different notation like this:
const char *const string_table[] PROGMEM = {string_0, string_1, string_2, string_3, string_4, string_5};
which is equivalent to:
PGM_P const string_table[] PROGMEM = {string_0, string_1, string_2, string_3, string_4, string_5};
Behind the scene, PGM_P is just const char* for a PROGMEM variable. Which way to use is a personal preference, personally I feel PGM_P macro is a little bit cleaner.
Storing String Literal in Program Space
As you see in the array of strings example, it takes some setup to print a few string literals, and the way to retrieve the data make the code a little bit less easy to understand of what's going on.
Sometime you have a string literal that you only use it once in your sketch, and often uses it with printing command such as this example Serial.println("Connecting to WiFi..."), but a string literal would take up SRAM, and with a few string literal here and there in your program will soon take up quite a bit of memory space, so you'd want to keep them in program memory. There are actually two way of keeping a string literal in program memory in Arduino. By either using `PSTR()` macro or `F()` macro, we will explain what they are and then why there are two macros to handle the string literal and what the differences between them.
PSTR() macro
PSTR came into Arduino from part of avr-libs defined in avr/pgmspace.h, it is actually a macro, not a function as many think it was, and is defined as:
#define PSTR(s) ((const PROGMEM char *)(s))
It not only tells the avr-gcc that the string literal s should be kept in program memory, but allows the program to convert it into a const char *s PROGMEM variable, in another word, it create a PROGMEM variable so that it can be pass around into some PROGMEM-aware functions as a parameter.
 //this is a PROGMEM-aware function in c
 printMsg_P(const char* str) {
     char buf[strlen_P(str)+1];
     strcpy_P(buf, str);
     puts(buf);
 }

 // this handle the normal string array function
 printMsg(const char* str) {
     puts(str);
 }
F() macro
Arduino introduces a F() macro, which takes a string literal and forces the compiler to keep it in program memory.
The F() macro is not part of the avr-libs. It is part of the Arduino String library, together with a wrapper class called __FlashStringHelper, defined in
class __FlashStringHelper;
#define F(string_literal) (reinterpret_cast(PSTR(string_literal)))
The F() macro at first looks quite intimidate but it is actually quite simple. What the F() macro does is to use the PSTR() to convert the string_literal into a const PROGMEM char *string_literal. The F() create a pointer to the inline string literal that can be stored in program memory and then typecasting into a class of __FlashStringHelper. The __FlashStringHelper macro is defined as a class without any body, literially an empty class, why is this useful? and why can't just pass the string literal around by just using PSTR().
This has to do with C++'s function overload. Function overload is a feature of C++ where multiple methods could have the same function name but each with different parameters. Within all the Serial.print() methods, there is a method Serial.print(const char* str) that will take in a string literal and print it to serial monitor, but it is not PROGMEM-aware, if you pass in a PROGMEM string literal Serial.print(PSTR("string literal"));, the same method will accept what you pass in because it meet the type checking (remember PSTR is actually const char*), but it will not print out the correct string for PSTR("string literal") because it simply expecting a normal string.
In c, as we see before, we solves the problem by using two functions with different names for handling normal string and PROGMEM string, but Serial is a C++ class, it needs another function overloaded method to be PROGMEM-aware, and PSTR() is clearly not the solution as we just mentioned.
What Arduino did is to create an overload method that is PROGMEM-aware by accepting a class as parameter, so that you can pass a F() wrapped string literal which has a data type of class __FlashStringHelper into the Serial.print().
Among all the function overloading methods of Serial.print(), there is one that accept __FlashStringHelper * class as function parameter:
Serial.print(const __FlashStringHelper *ifsh)
and you can use it like this:
Serial.print(F("Connecting to WiFi..."));
or
static const char *myProgSpace PROGMEM = "This is string stay at Program Space";
Serial.print((const __FlashStringHelper *)myProgSpace);
You can read the source code of actual implementation of
Serial.print(const __FlashStringHelper *ifsh)overloaded method at Print.cpp
So in summary, the F() and PSTR() are alike, both telling the compiler to keep the string literal in the program memory, and allow the string literal to be pass around into some function as parameter. But it was designed for different purpose from different programming paradigm (C versus C++). F() is Serial.print()-friendly, while PSTR() is not.
There is a caveat for both F() macro and PSTR() macro that the compiler will consider each string literal wrapped by the F() macro and PSTR() macro as different one even you use it twice or more in your Sketch with the same string literal content. Therefore if you use the same string literal for more than once, it make sense to define it as a PROGMEM variable that we discussed before to gain the compiler optimisation benefit so that it won't repeatedly stored in the program memory.
Summary
In summary, the macros and functions used to retrieve data from the Program Space take some extra code in order to actually load the data from the Program Space. This incurs some extra overhead in terms of code space in Flash memory and execution time. Usually, giving the small SRAM space such as Arduino Uno (2kB SRAM) or ATtiny85(512 bytes SRAM), the benefit of using PROGMEM often surpass the overhead in execution time and extra Flash memory occupied.
Futher Readings
<avr/pgmspace.h> - http://www.nongnu.org/avr-libc/user-manual/pgmspace.html
Data in Program Space - http://www.nongnu.org/avr-libc/user-manual/pgmspace.html
Difference Between Von Neumann and Harvard Architecture? - https://www.listdifferences.com/difference-between-von-neumann-and-harvard-architecture/
Arduino PROGMEM Reference - https://www.arduino.cc/reference/en/language/variables/utilities/progmem/
This is the best explanation of PROGMEM and how to use it that I’ve seen anywhere. Thank you very much for putting this together.
Great explanation! Thank you very much. Very well done.
Best explanation of PROGMEM for sure. I’ll be binging the site now, and checking back often for more.
VERY NICE! the best!
This is the best explanation of PROGMEM. I was looking for ways of solving the problem of “Low memory…” on arduino mega which resulted after I declared so many arrays. Using this example, I was able to free lots of SRAM
WOW, thank you! You saved my project. I could not read my array from flash, I tried for HOURS and was about to give up, when I saw your document. I never would have known that it was PROGMEM causing the problem. Your explanation and sample code was EXACTLY what I needed! I can’t thank you enough. Great job!
Thanks a lot!!!
VERY GOOD! Thank you so much for this deep explanation!
I read this month ago and today a needed a refresh of the knowledge!
Now I understand whats going on in deep!
Such a helpful, thorough, and clear explanation; much appreciated!!