If you are a blogger and a programmer, the chances are that you will often shows some programming code on your blog. The codes that you shared may not be syntax-highlighted like what you see on your favourite text editor or IDE, but it is easy to add syntax highlight to your WordPress blog using Highlight.js (hljs).
Step 1 - Download highlight.js
Goto highlight.org. Turn off the languages you're not interested in before clicking on the download button. The downloaded package consists of a folder that including the customised highlight.pack.js supporting all the languages you chosen and a styles folders with many syntax styling css files.
Step 2 - Host it in your WordPress server
Upload the downloaded folder to your WordPress server, I put it in my /wp-content/themes/e-tinkers/ directory where all my theme's codes located. e-tinkers is the name of my theme, remember to replace it with your theme's name. Change the file access permission if necessary with the command:
sudo chmod 644 highlight/highlight.pack.js
The code required for using highlight.js on a web page is linking to the highlight.pack.js library and calling hljs.initHightlightingOnLoad(). You may also need to configure the highlighter before calling hljs.highlightingOnLoad(). The hljs.configure() allows user to pass in global options to alter the behaviour of highlight.js. For example, I will have to set the global option useBR to false in order for the highlighter to function properly for this blog. You can check the Library API for more configuration options. Here is my final script that I used for the highlighter.
<script src="highlight/highlight.pack.js"></script>
<script>
    hljs.configure({
        useBR: false
    });
    hljs.initHighlightingOnLoad();
</script>
The Javascript need to be added to the footer of your blog template, but you don't want to add this to all the WordPress pages, you will probably only need the syntax highlight on individual(i.e. single) post page.
Option 1 - Add to footer.php
There are a couple of ways to add the code to the post template. One way is to add it directly to the footer.php, right before the </body> closing tag.
<?php if( is_single() && get_post_type()=='post' ): ?>
    <script src="<?php echo get_template_directory_uri() . '/highlight/highlight.pack.js'; ?>"></script>
    <script>
        hljs.configure({
            useBR: false
	});
        hljs.initHighlightingOnLoad();
    </script>
<?php endif ?>
Option 2 - Add via function.php or self-created plugin
Alternatively, you can inject the javascript codes via WordPress hook function, this can be added either to the functions.php if you are using a child theme, or via a plugin. Since I have my own customisation plugin that I created for handling all the customisations and optimisations, i simply add it into the plugin.
/* Add syntax highlight support */
function add_highlight_scripts() {
if ( is_single() && get_post_type()==='post' ) { ?>
    <script src="<?php echo get_template_directory_uri() . '/highlight/highlight.pack.js'; ?>"></script>
    <script>
        hljs.configure({
            useBR: false
	});
        hljs.initHighlightingOnLoad();
    </script>
<?php
}
add_action( 'wp_footer', 'add_highlight_scripts' );
Step 3 - Add syntax styling CSS
Among all the css files in the downloaded styles directory, you only need one of those style sheets that suit your preference. Which one you prefer is a personal taste. Personally, I created a new syntax style called e-tinkers.css based on the atom-one-light.css to make it consistent to my theme.
The link for referring the css file need to be add to the <head> section of your blog template. Again, you can add it to header.php directly to the header.php right before the closing tag </head>:
<?php if( is_single() && get_post_type()=='post' ) {?>
<link href="<?php echo get_template_directory_uri().'/highlight/styles/e-tinkers.css'; ?>" rel="stylesheet" type="text/css" media="all">
<?php endif ?>
Or inject the css reference link via WordPress wp_enqueue_style() function:
function add_syntax_stylesheet() {
    if ( is_single() && get_post_type()==='post' ) {
        wp_enqueue_style( 'e-tinkers', get_template_directory_uri().'/highlight/styles/e-tinkers.css' );
    }
}
add_action( 'wp_enqueue_scripts', 'add_syntax_stylesheet' );
This should complete all the installation and setup, you have enabled the syntax highlight for your WordPress. Next is how to use it properly.
Step 4 - Use the syntax highlight properly?
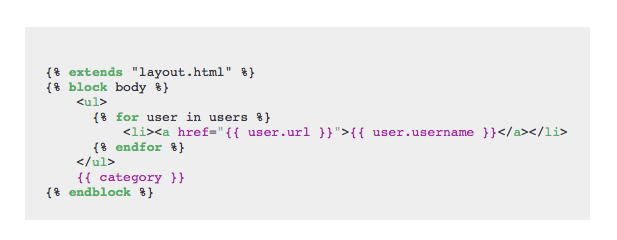
By default hljs.initHighlighting() will syntax-highlight the block of code in your blog wrapped within <pre><code> … </code></pre> html tags.
<pre>
    <code>
        //code snippets to be highlighted
    </code>
</pre>
If your blog is not using these tags for wrapping the code snippets, you will have to customise the javascript to specify the specific query selector you are using. My blog only using <pre> … </pre> to wrap the code snippets. So what I did is to search highlight.pack.js for:
var e=document.querySelectorAll("pre code");
and replace it with:
var e=document.querySelectorAll("pre");
The syntax highlighter detects programming language automatically, but occasionally, the automatic detection does not works properly, when this happen, you can manually set the language by adding a class attribute to the block wrapper.
<pre class="php">
    your php code here
</pre>